How To Make An Artificial Spring Wreath
27 Jan 2023
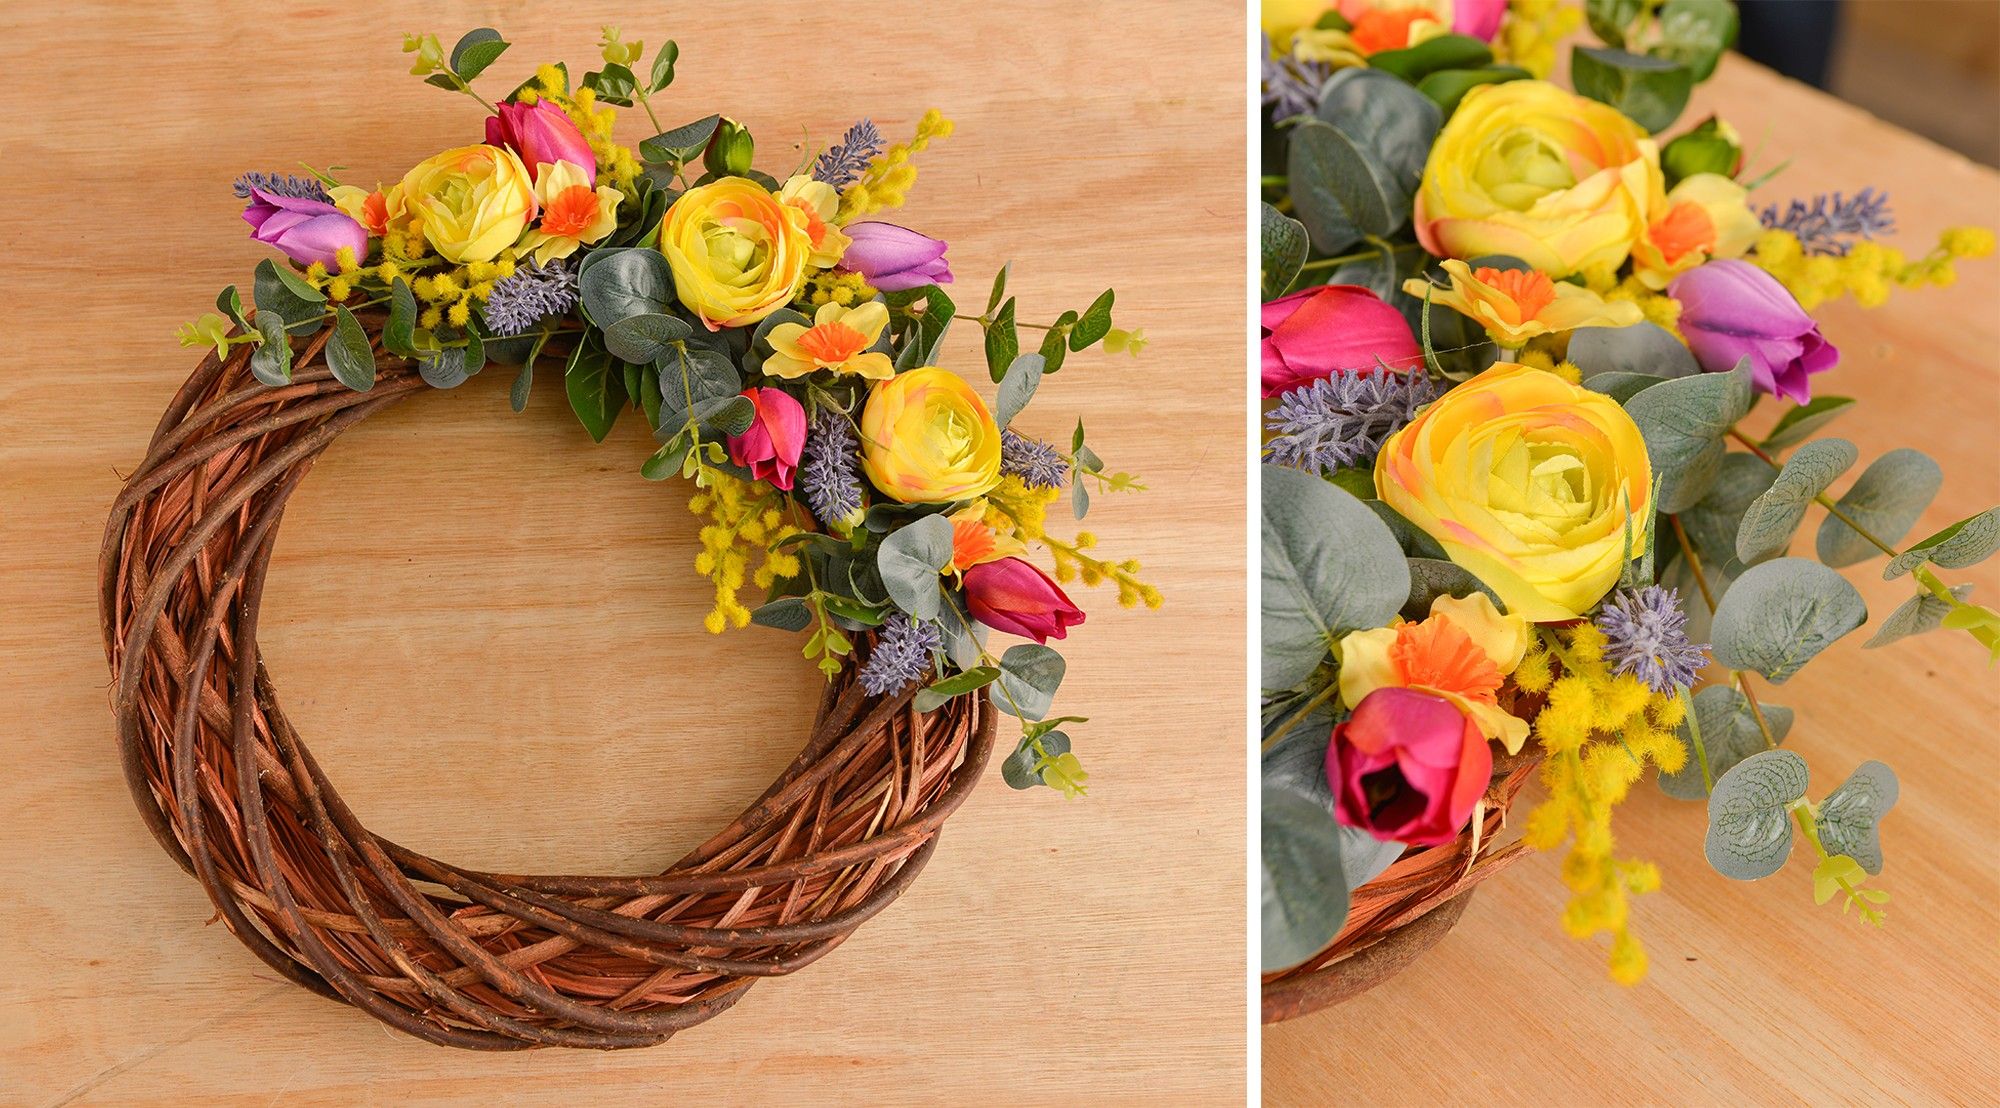
Wreaths are growing increasingly popular as the Seasons change, as they give you the 'Welcome Home' feeling! As the new season of Spring approaches, there is no better way than to get ready by brightening up your Doorway. Spring offers beautiful budding flowers, so much colour, and vibrant greenery; offering you the perfect array of colours and blooms to choose from.
This how-to guide is perfect if you are a Beginner in the Flower Arranging World, or simply a Hobbyist looking for some inspiration! Follow these step-by-step instructions and simply get stuck in;
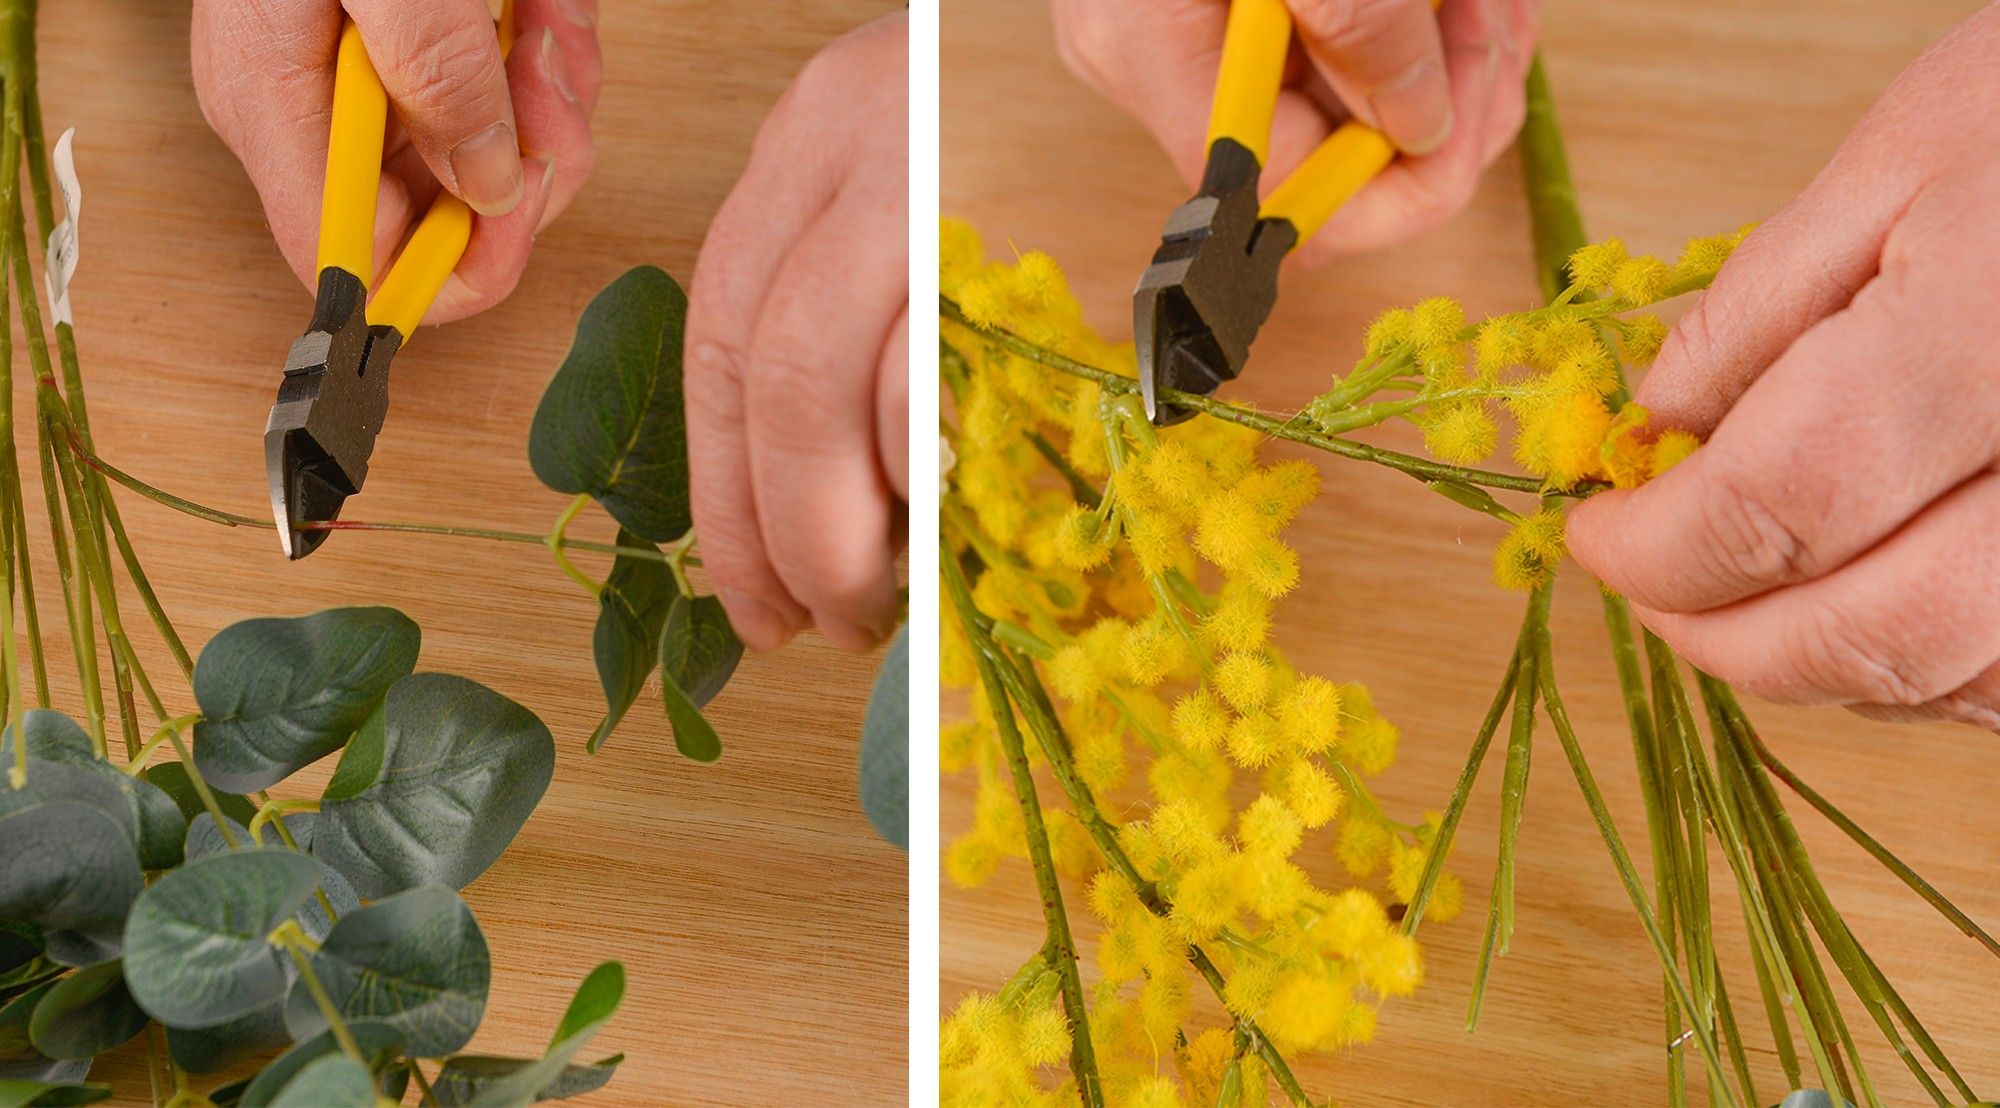
What Will You Need:
Mimosa - 335914
Ranunculus -Sf0786Y
Tulips - 830266
Lavender - Sf0847
Daffodils - 878398
Eucalyptus - SF0338G
Knife - SC4621
Wire Cutters - SC4621
Glue Gun
Unpeeled Willow Ring (35cm) -BK1885
Step 1)
Firstly, make sure to gather all of the materials needed for this Artificial Spring Wreath - when you are prepared, you can turn on your glue gun and let it heat up - making sure to place it on a heatproof surface.
To start with, you will be using Eucalyptus and Mimosas - as these are brought in bundles, you will need to cut them into individual stems. Make sure to cut quite far down to give a nice long stem, as these will be placed into the wreath base.
Step 2)
Starting with the Eucalyptus, put a small amount of glue on the ends of the stem, and gently push into the gaps of the Wreath Base, (we suggest laying out the stems before gluing just so you are happy with the placement before it becomes finalised). Add the Eucalyptus in separate ends, so they meet in the middle, this will give a nice full-looking wreath.
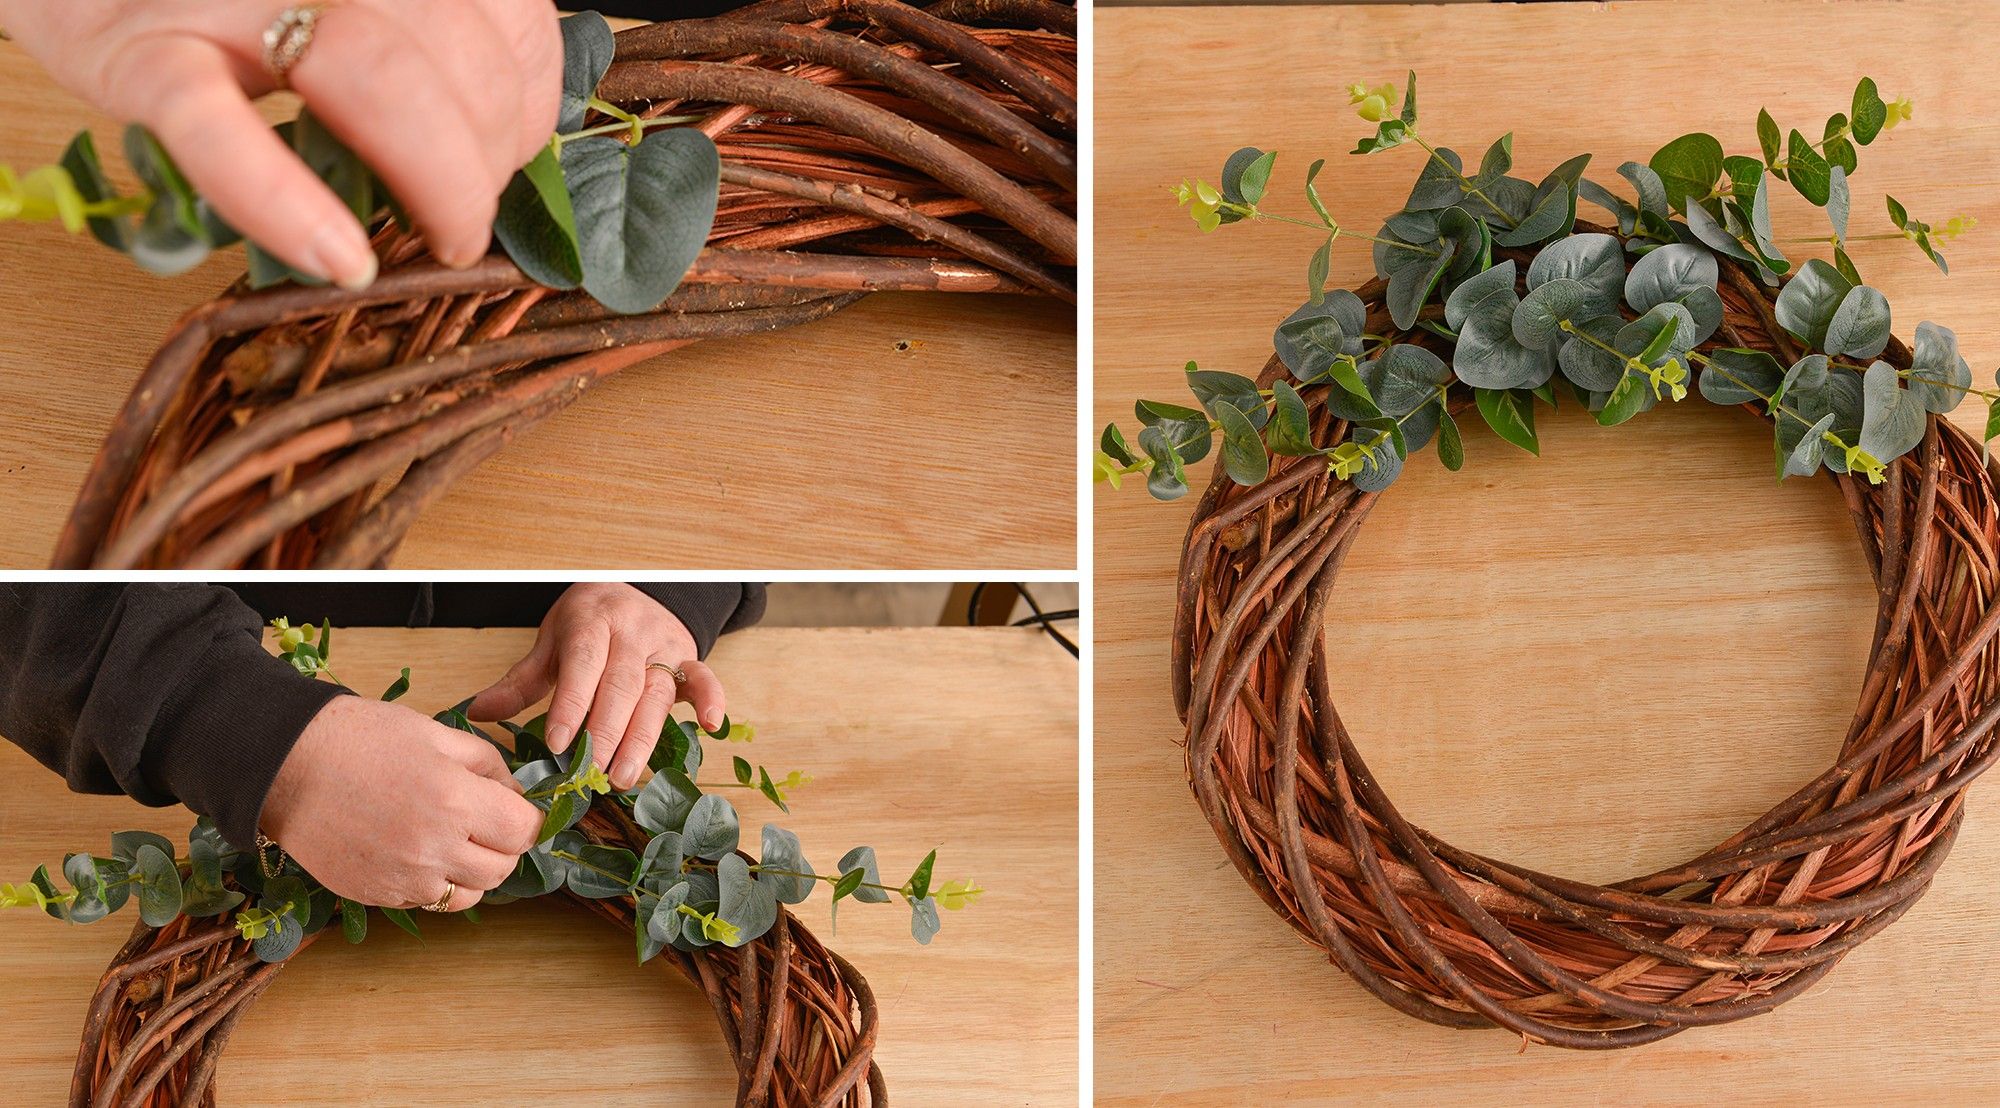
Step 3)
Once you are happy with the way the greenery looks as a base, it is now time to add the colourful Mimosa - this will add a gorgeous texture to the Wreath.
When adding, follow the same style as the Eucalyptus, in-keeping the same shape. Tuck the Mimosa into the Eucalyptus, but use slightly less than before and spread out across the base as pictured below.

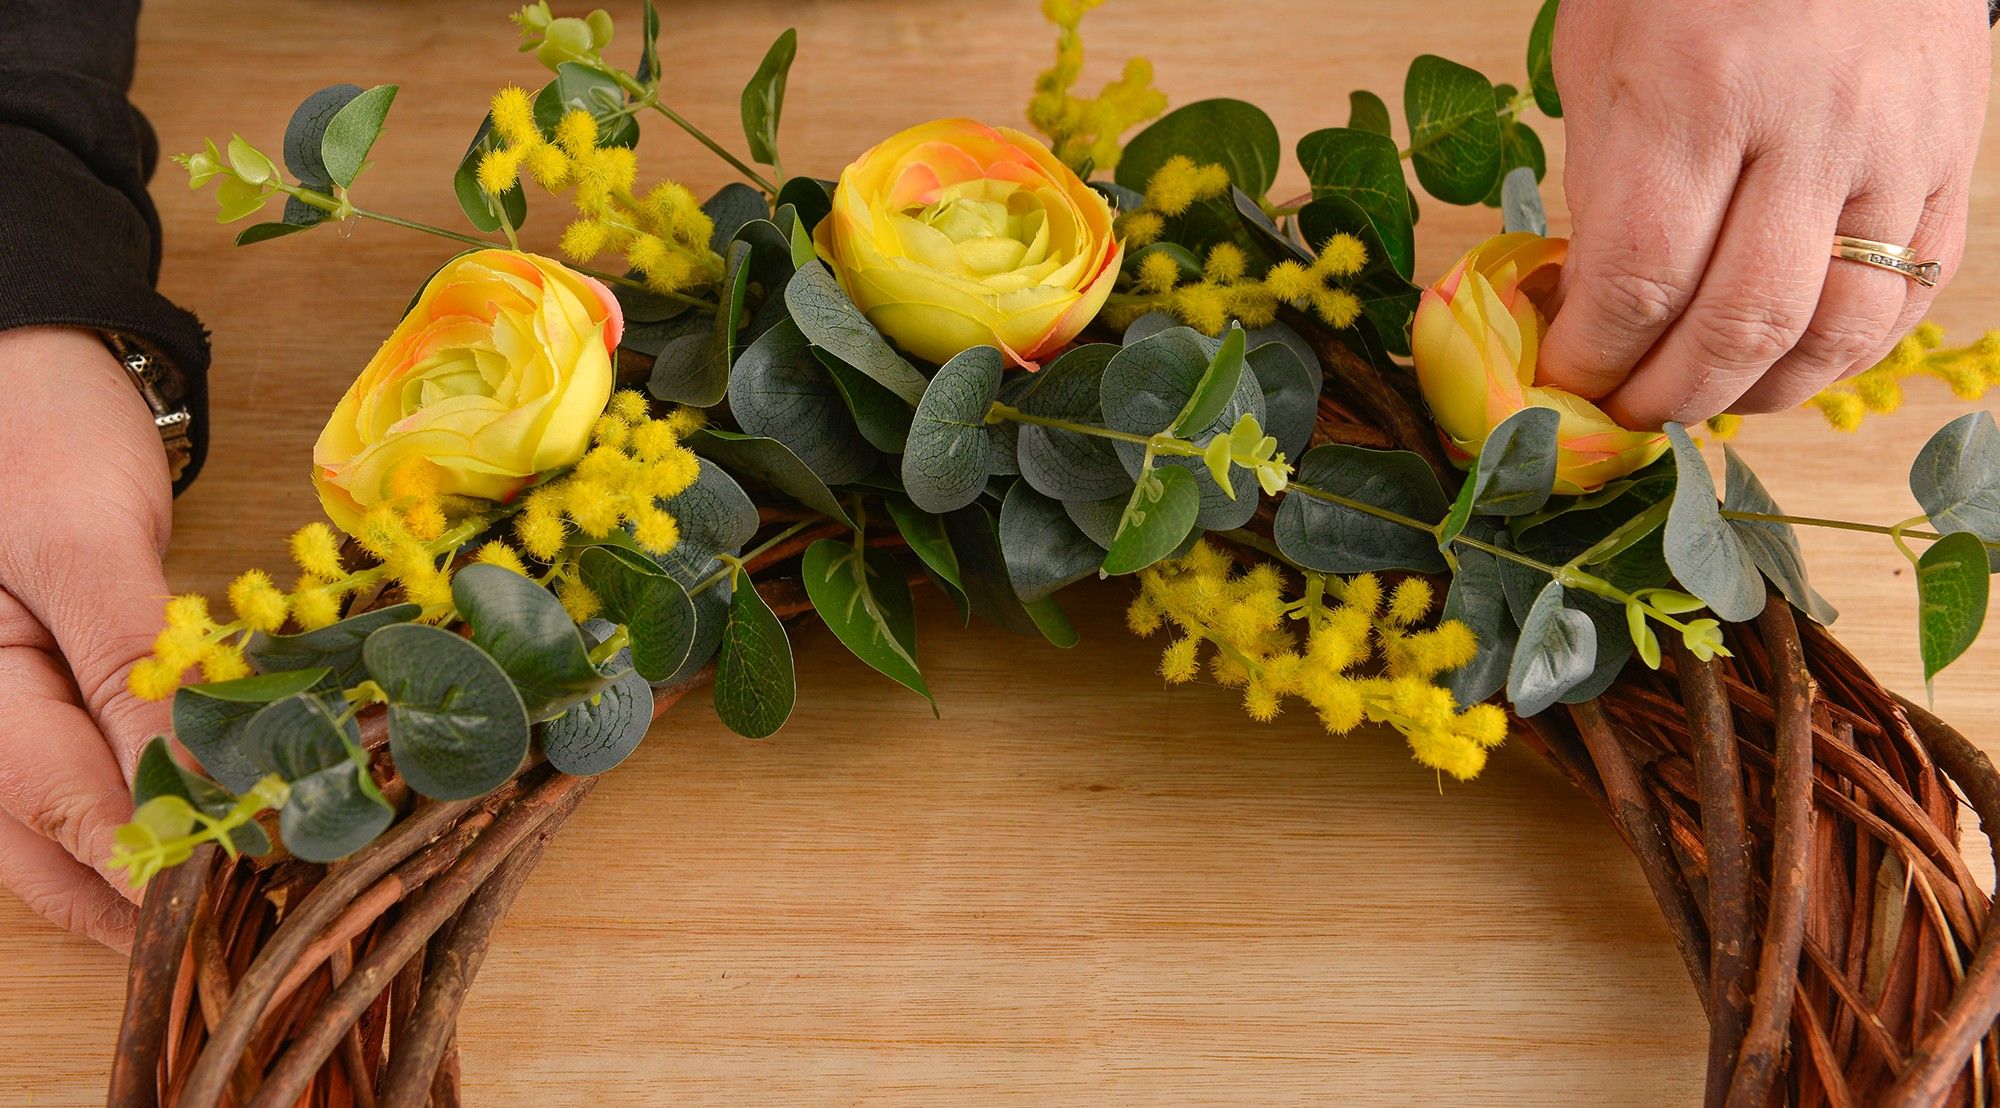
Step 4)
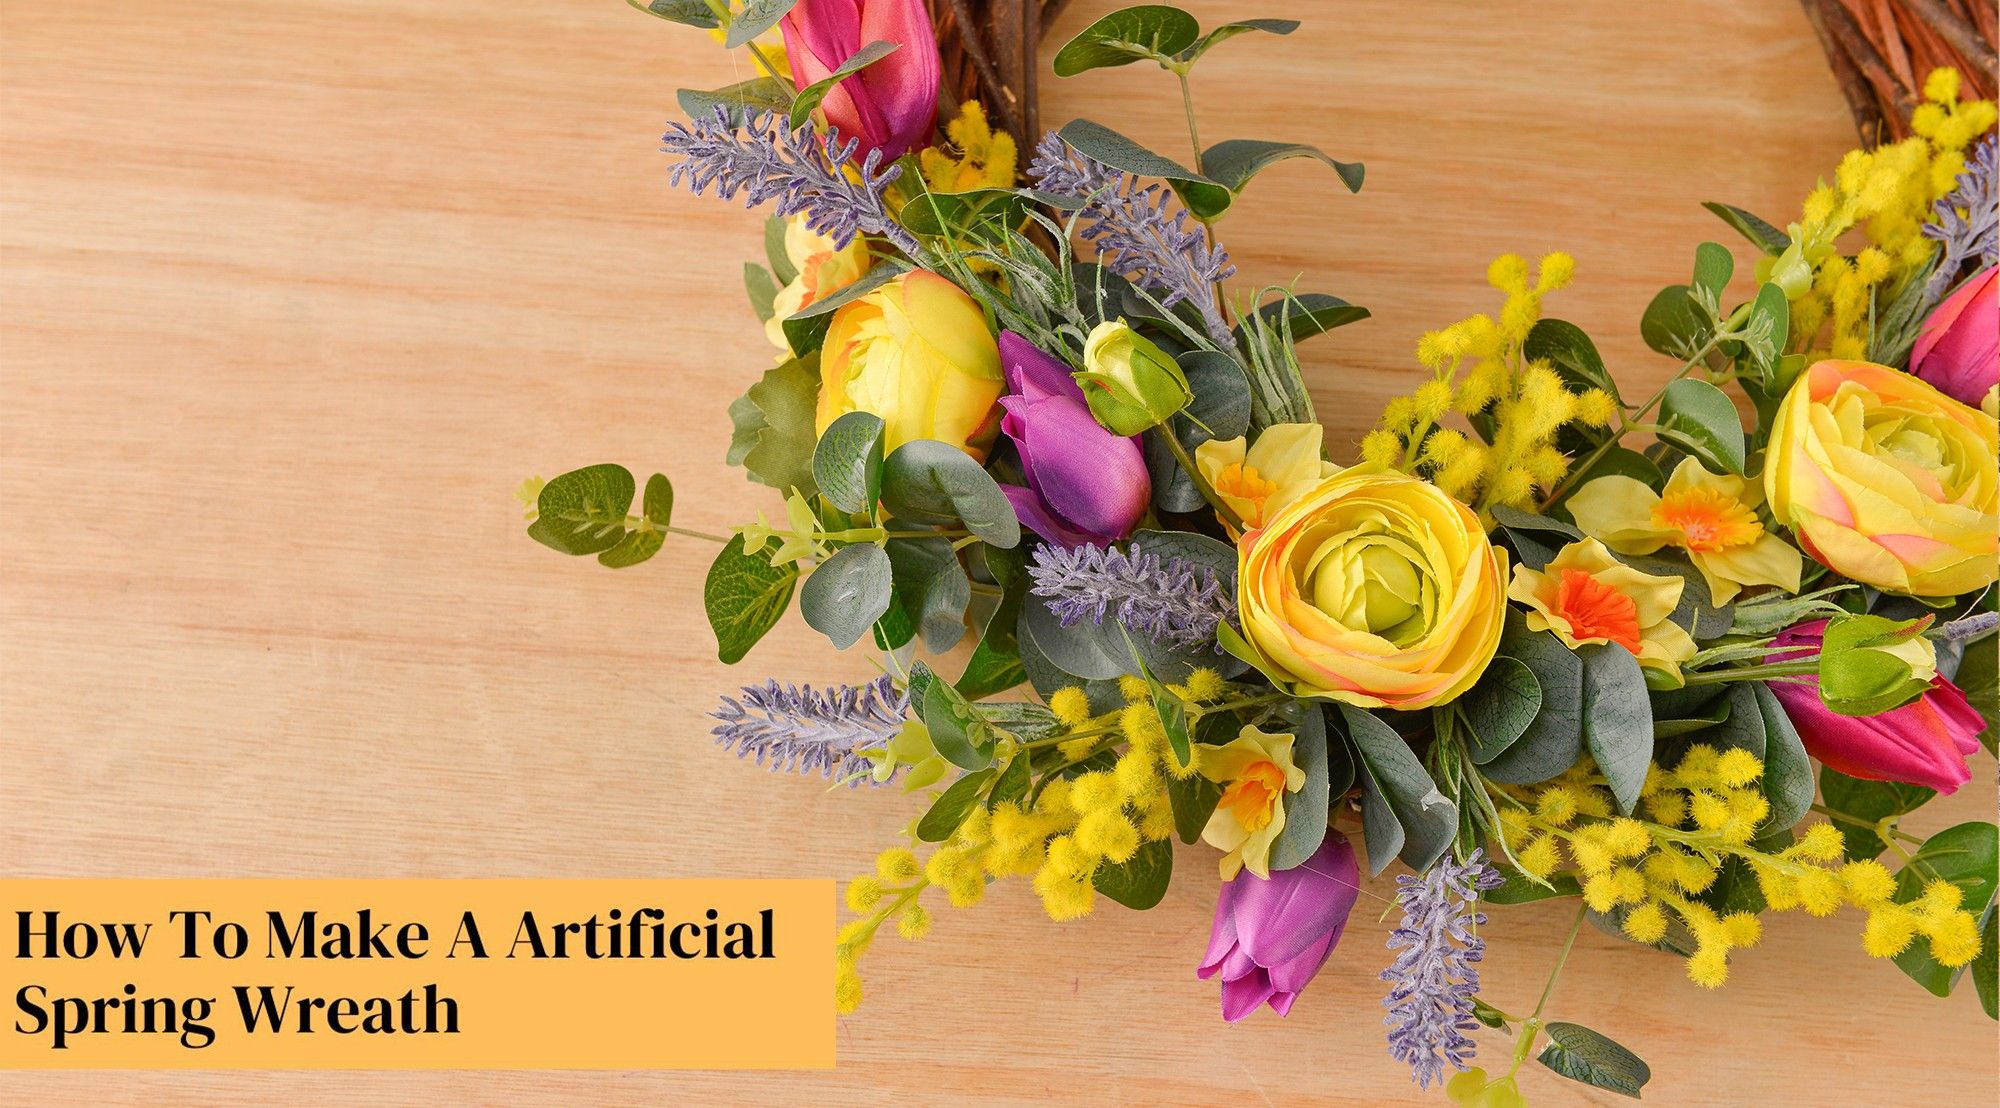
Now you can add in your focal flower, Ranunculus! We used three, in which we equally spread across the wreath framing the shape. When you cut, make sure to cut the stem quite short and put your glue on the end, it should be slot into the Willow Base perfectly keeping it secure.
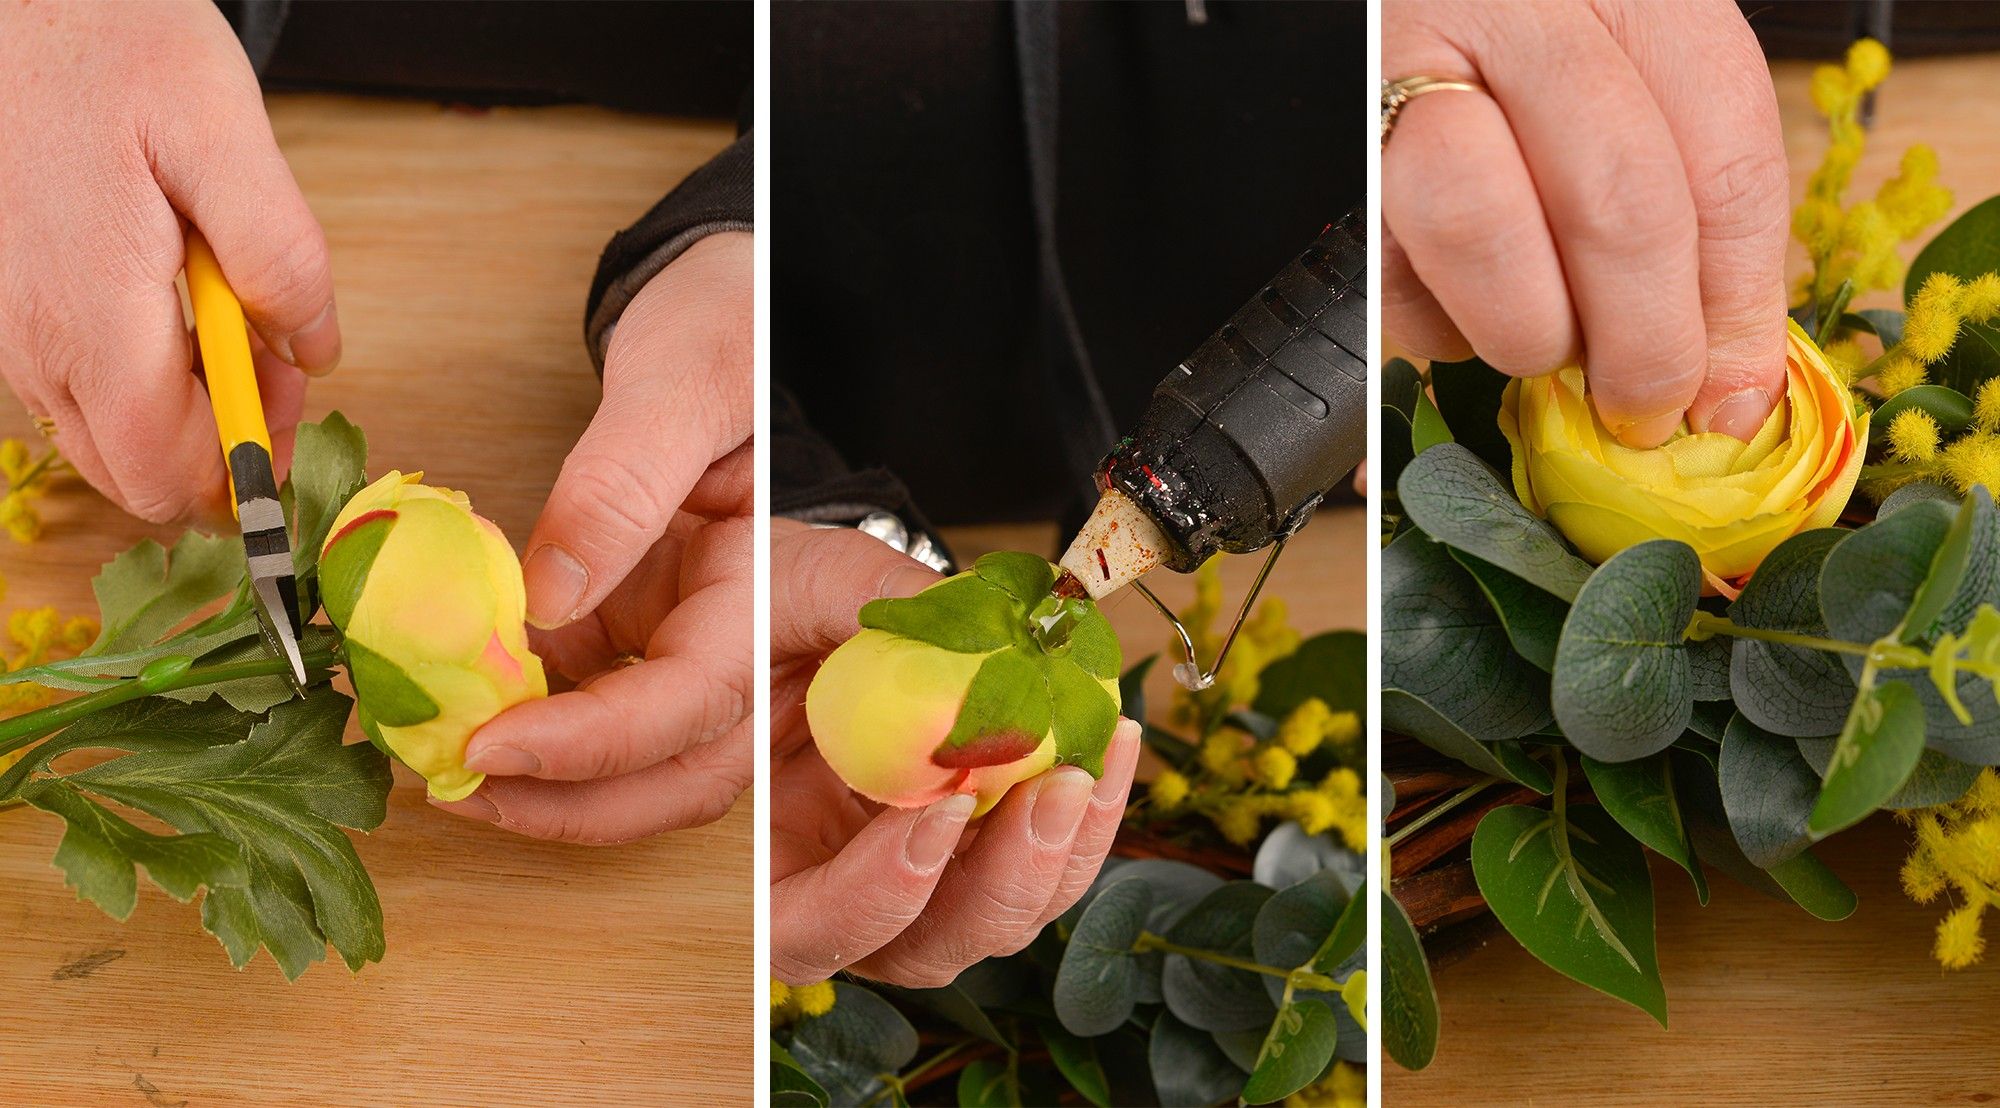
Top Tip:
When making wreaths, make sure to add the Focal Flower/s in uneven numbers (usually 3's or 5's), this will keep it looking aesthetically pleasing!
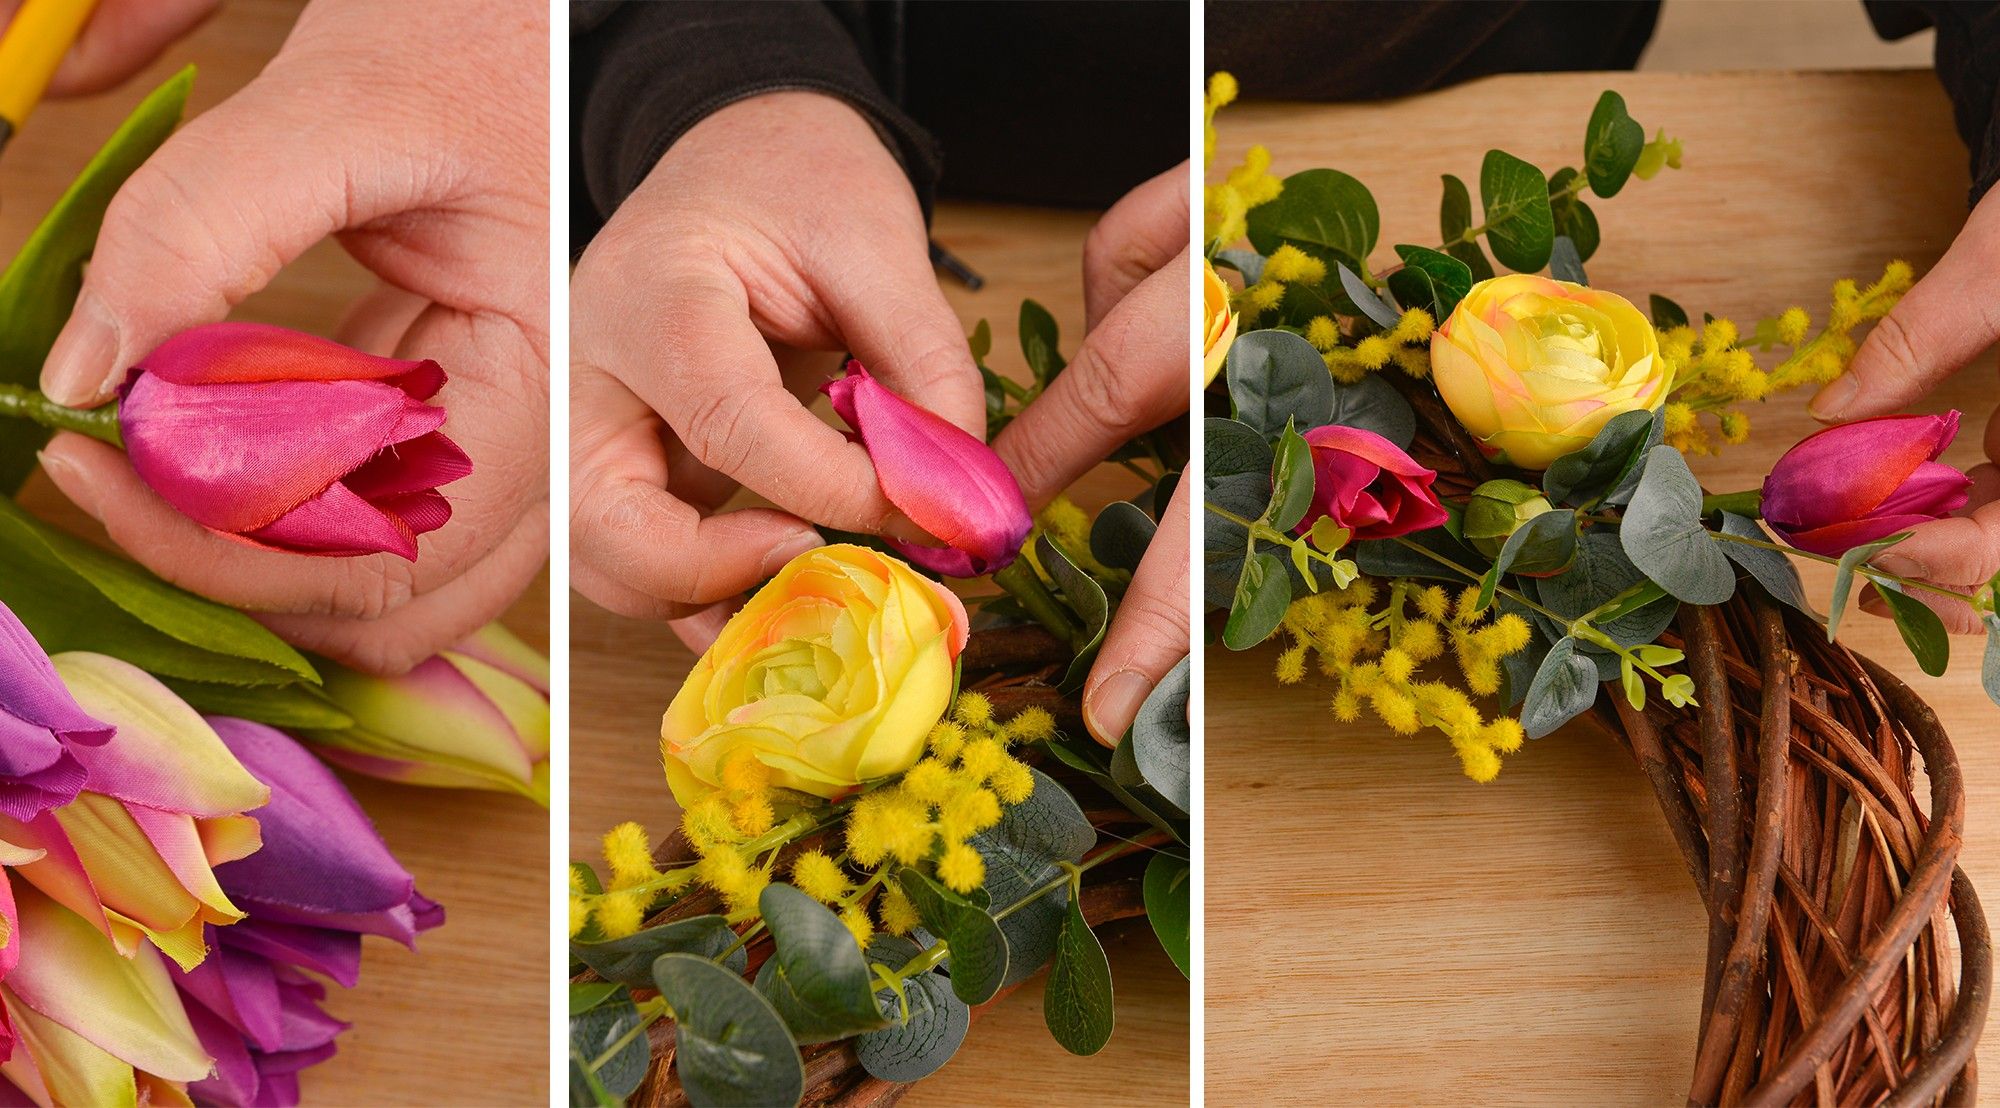
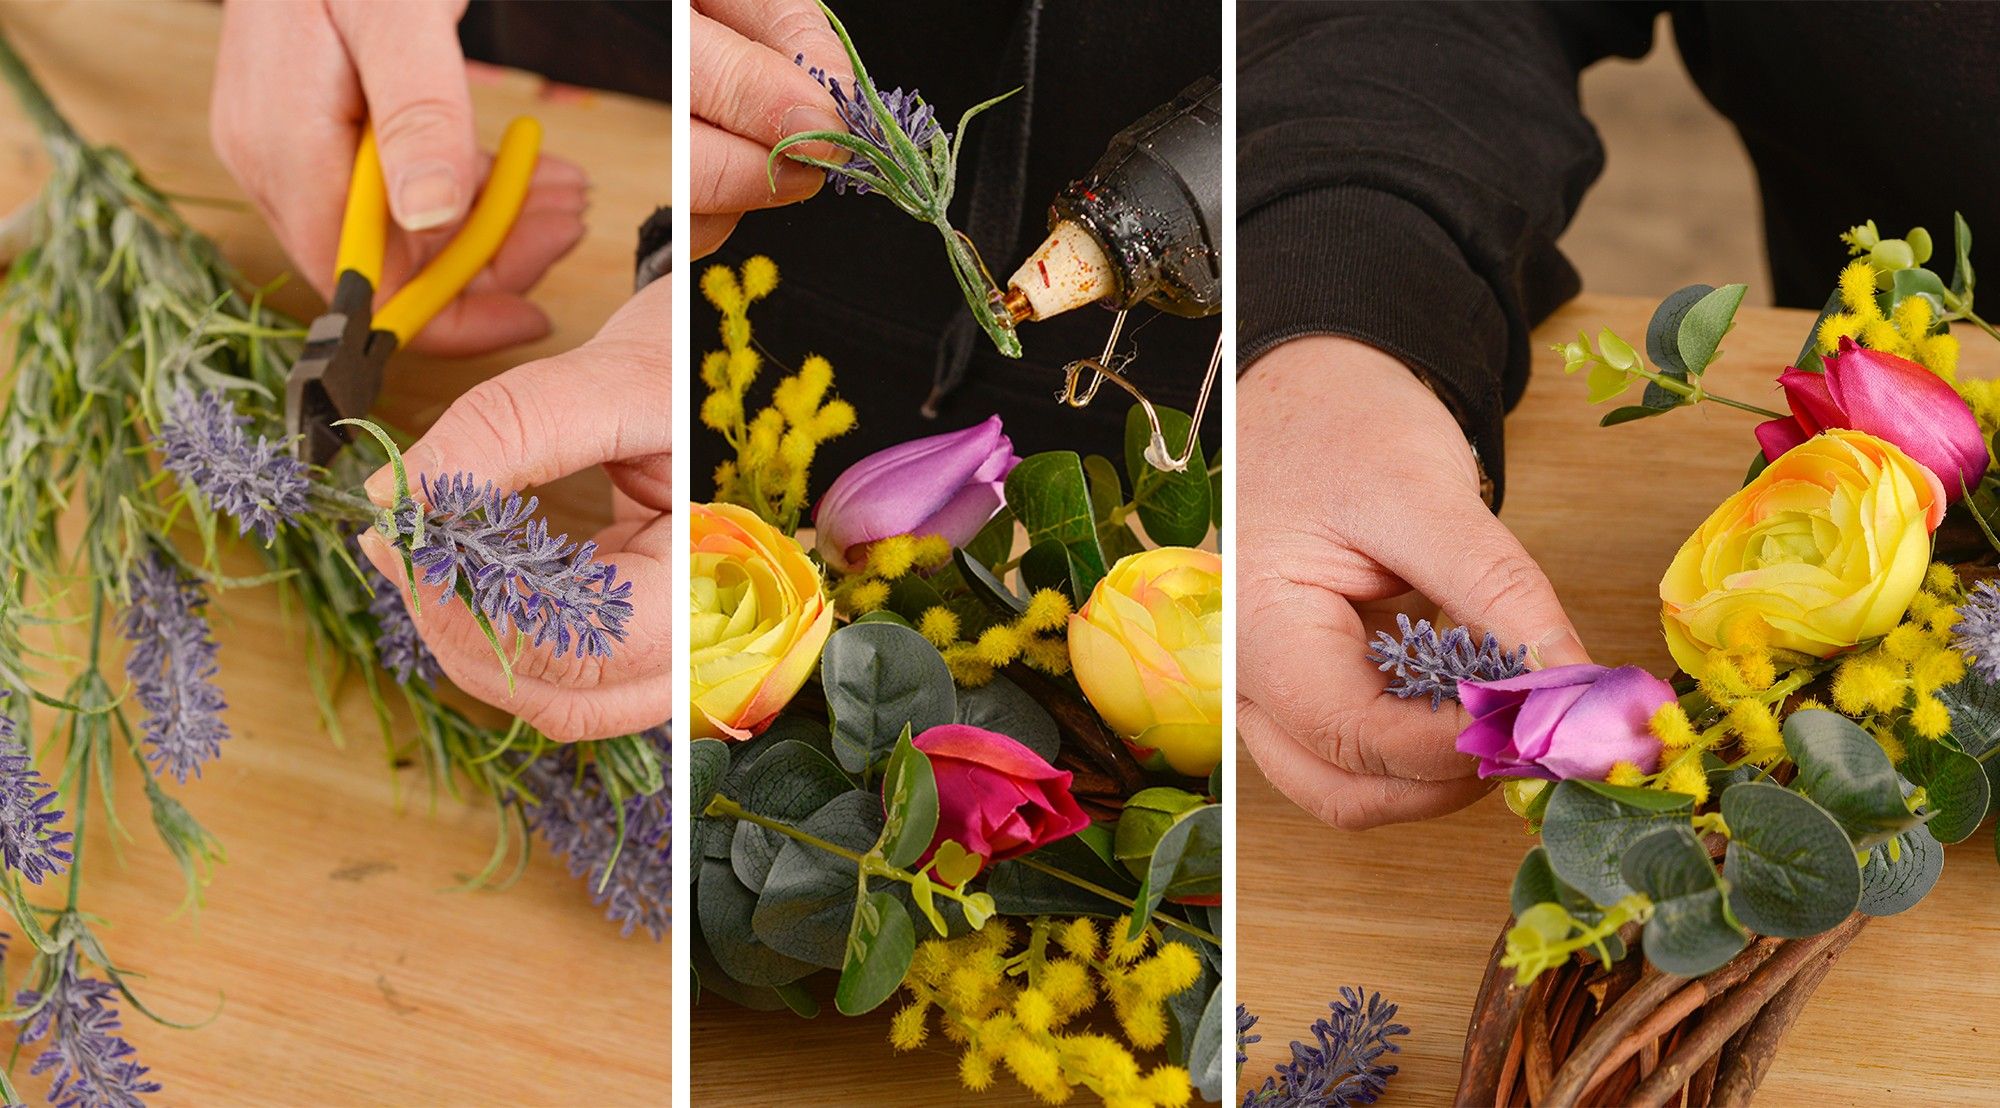
Step 5)
Next, we added in the tulips (filler flowers), again, make sure to add uneven numbers! We added 5 Tulips which we spread out across the wreath to keep it looking colourful throughout. Make sure to add them in slightly different directions and heights, which will give it a nice full look.
Step 6)
Following the same process, you can now add your Lavender - the Lavender creates a lovely new texture, as well as sticking out slightly to cover some more heights of the Wreath, compared to the flatter smaller flowers.
Make sure to leave a little stem, so they can gently be glued and stuck inside the willow base.
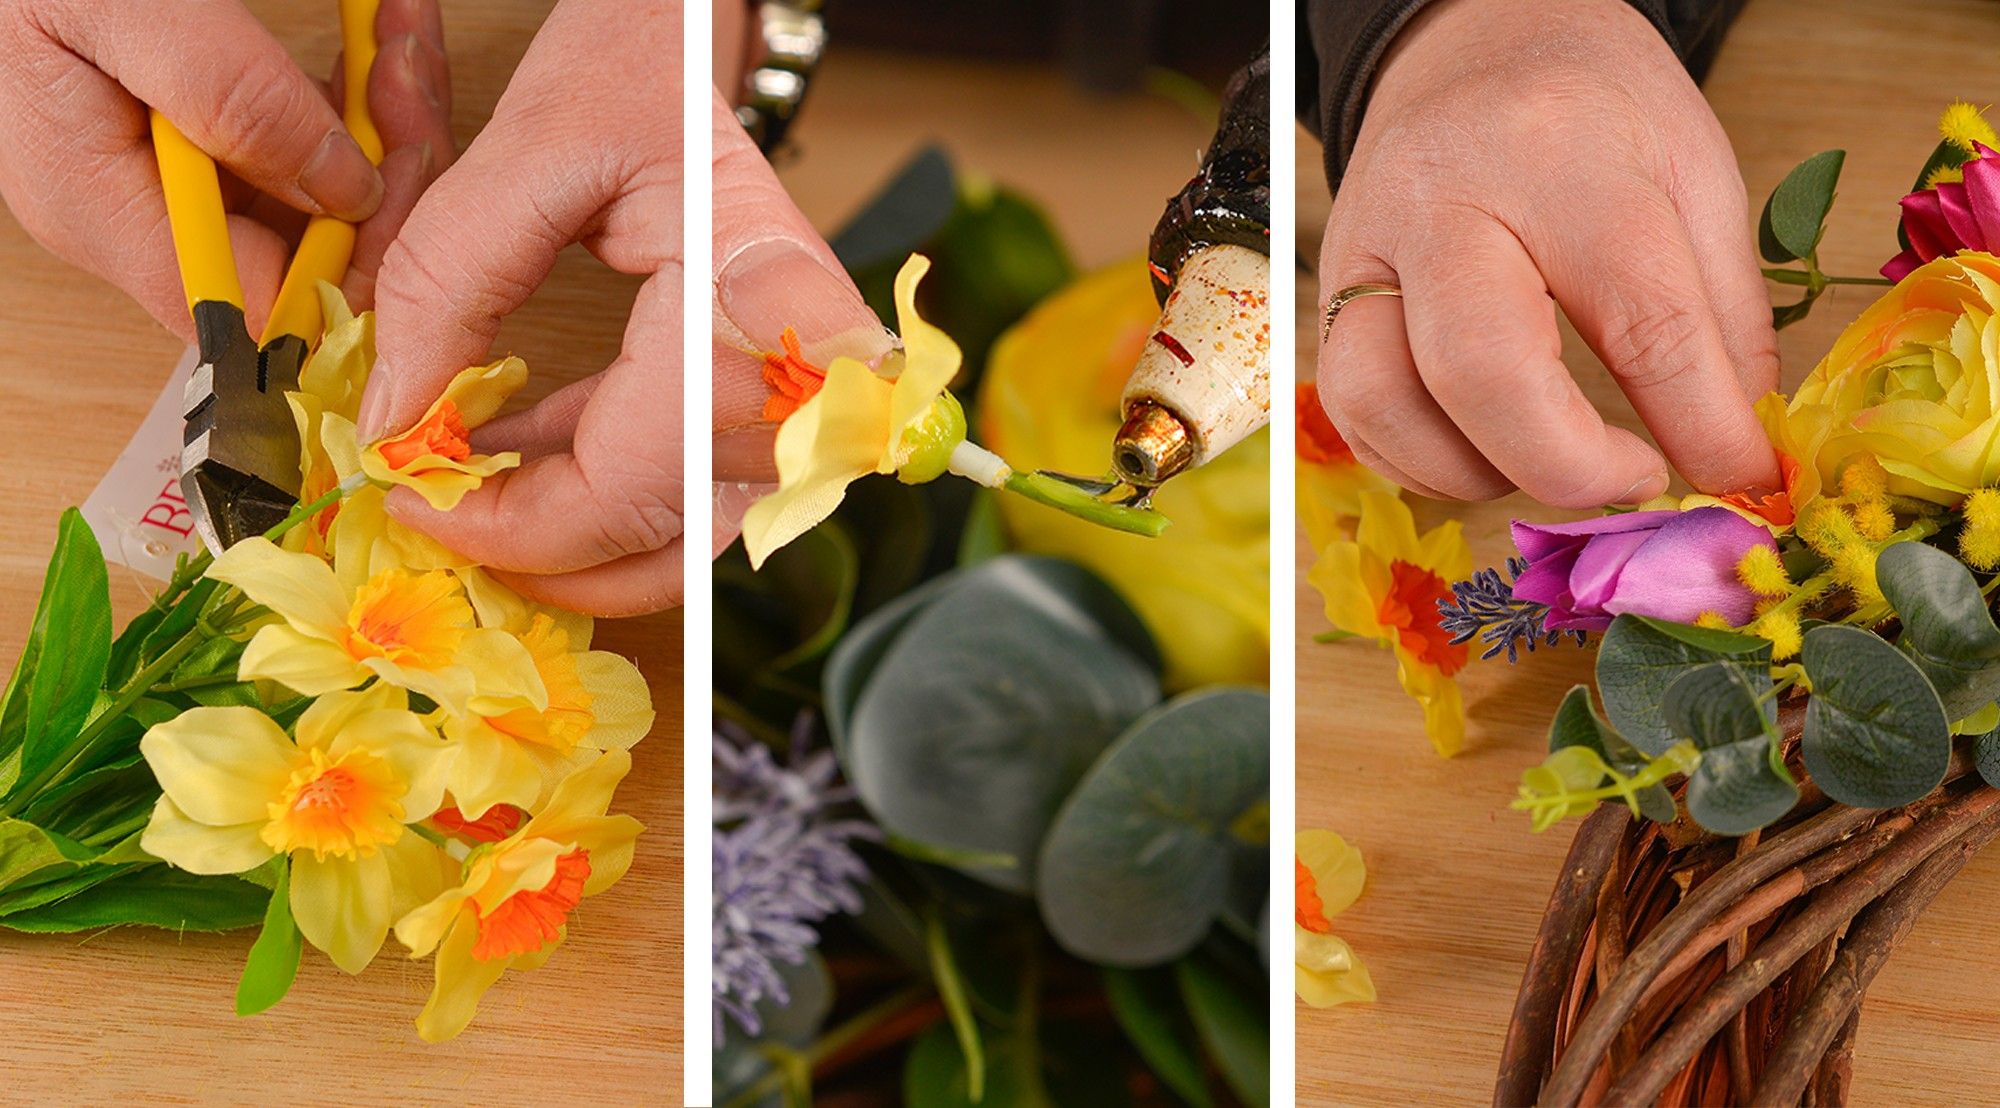
Step 7)
Finally, you can add your last filler flower, Daffodil. Cut the stem quite small and push in from the top, and pop them in any places you feel may look slightly 'empty', or has gaps - remember to use an uneven number.
Feel free to add a ribbon, however, we decided to leave ours without one, as this particular wreath base can be placed directly on the Wreath Door Hanger!